A Beginner's Guide to Growing Hydroponic Bell Peppers
Bell peppers, known scientifically as Capsicum annuum, are vibrant and versatile vegetables that add both color and flavor to a wide array of dishes. With their sweet, crisp texture and mild taste, they are a favorite among chefs and home cooks alike. Available in a spectrum of colors—including green, red, yellow, and orange—bell peppers not only enhance the visual appeal of meals but also pack a nutritional punch, being rich in vitamins A, C, and antioxidants. Whether used raw in salads, sautéed in stir-fries, or roasted to bring out their natural sweetness, bell peppers are a staple in kitchens around the world. As more people turn to innovative growing techniques, such as hydroponics, cultivating these delicious vegetables at home has become more accessible and rewarding than ever. In this blog, we will explore the fascinating world of bell peppers, from their cultivation and pollination techniques to their culinary uses and health benefits.
When it comes to growing bell peppers hydroponically, several systems can be effective, but certain methods tend to work better than others due to the specific needs of bell pepper plants. Here are some of the best hydroponic systems for growing bell peppers, along with their pros and cons:
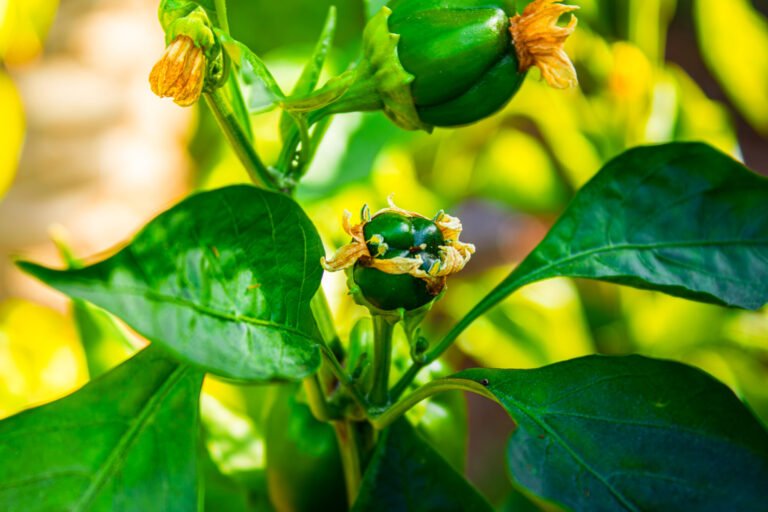
Choosing the Right Hydroponic System
Types of Hydroponic Systems
Deep Water Culture (DWC)
Description: In a DWC system, plants are suspended in a nutrient-rich water solution, with their roots submerged in the water while the upper part of the plant is above the water line.
Pros:
– Rapid Growth: Provides constant access to nutrients and oxygen, leading to vigorous growth.
– Simple Setup: Relatively easy to set up and manage.
– Low Maintenance: Requires less frequent monitoring compared to some other systems.
Cons:
– Temperature Sensitivity: Water temperature must be monitored to prevent root rot and ensure oxygen levels.
– Oxygenation: Requires air stones or pumps to ensure adequate oxygenation of the water.
Nutrient Film Technique (NFT)
Description: In NFT, a thin film of nutrient solution continuously flows over the roots of the plants, which are supported in a sloped channel.
Pros:
– Efficient Use of Nutrients: Minimal waste of nutrient solution as it recirculates.
– Good Aeration: Roots are exposed to air and moisture, promoting healthy growth.
Cons:
– System Failure Risk: If the pump fails, the plants can quickly suffer from lack of nutrients and water.
– Technical Setup: Requires a bit more technical knowledge to set up and maintain.
Ebb and Flow (Flood and Drain)
Description: In this system, a grow tray is periodically flooded with nutrient solution, which then drains back into a reservoir. The roots are submerged during the flooding phase and exposed to air during the draining phase.
Pros:
– Flexibility: Can be used with a variety of growing mediums, allowing for customization.
– Good Oxygenation: Roots receive both water and air, promoting healthy growth.
Cons:
– More Complex: Requires a timer and additional components, making it more complex to set up.
– Potential for Root Rot: If the system is not properly managed, roots can stay too wet for too long.
Aeroponics
Description: In an aeroponic system, plant roots hang in the air and are misted with a nutrient solution at regular intervals.
Pros:
– High Oxygen Levels: Roots receive maximum oxygen, promoting rapid growth.
– Efficient Water Usage: Uses less water compared to other methods.
Cons:
– Complexity: More technical setup with higher maintenance and monitoring needs.
– Potential for System Failure: If misting fails or the pump stops, plants can suffer quickly.
Vertical Hydroponics
Description: Vertical systems can utilize various methods (like DWC or NFT) but are structured to grow plants vertically, saving space and allowing for higher density planting.
Pros:
– Space Efficiency: Ideal for maximizing space, especially in limited areas.
– Good Airflow: Vertical arrangements can improve airflow around plants.
Cons:
– Maintenance Difficulty: Can be harder to manage and access plants for pruning or harvesting.
– Water Distribution: Ensuring all plants receive adequate nutrient flow can be challenging.
Tips
Best System for Bell Peppers: Deep Water Culture (DWC) and Ebb and Flow systems are often recommended for growing bell peppers due to their simplicity, efficient nutrient delivery, and strong growth potential. However, the choice of system will depend on your available space, budget, and level of experience with hydroponics.Regardless of the system you choose, ensure proper nutrient management, pH balance, and environmental controls to achieve the best results for your bell pepper plants.When growing bell peppers hydroponically, proper spacing and temperature are crucial for healthy growth and optimal yields. Here’s a detailed overview of both requirements:
The process of growing Hydroponic Bell Peppers
Preparing Your Hydroponic Setup
Equipment Needed:
– Hydroponic system (choose based on your choice).
– Grow lights (LEDs are energy-efficient and effective).
– Air pump and air stones (for DWC).
– pH meter and TDS meter (for monitoring nutrient levels).
– Setting Up:
– Step-by-step instructions for setting up the chosen hydroponic system.
– Tips for maintaining optimal temperature and humidity.
Selecting the Right Variety of Bell Peppers
When it comes to growing bell peppers hydroponically, certain varieties tend to perform better due to their growth habits, disease resistance, and overall yield. Here are some recommended bell pepper varieties that are well-suited for hydroponic systems:
Recommended Bell Pepper seed Varieties for Hydroponics
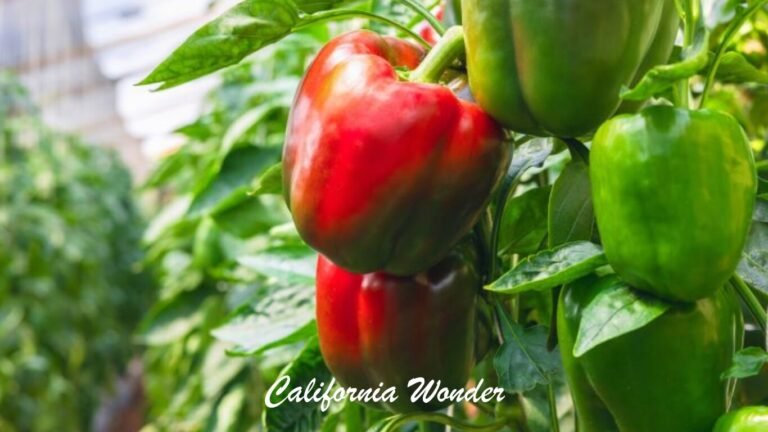
California Wonder
-Description: A classic bell pepper variety, California Wonder is known for its blocky shape and sweet flavor. It matures to a vibrant green, and if left to ripen, it turns red.
– Growth Habit: Compact and sturdy, making it suitable for smaller hydroponic systems.
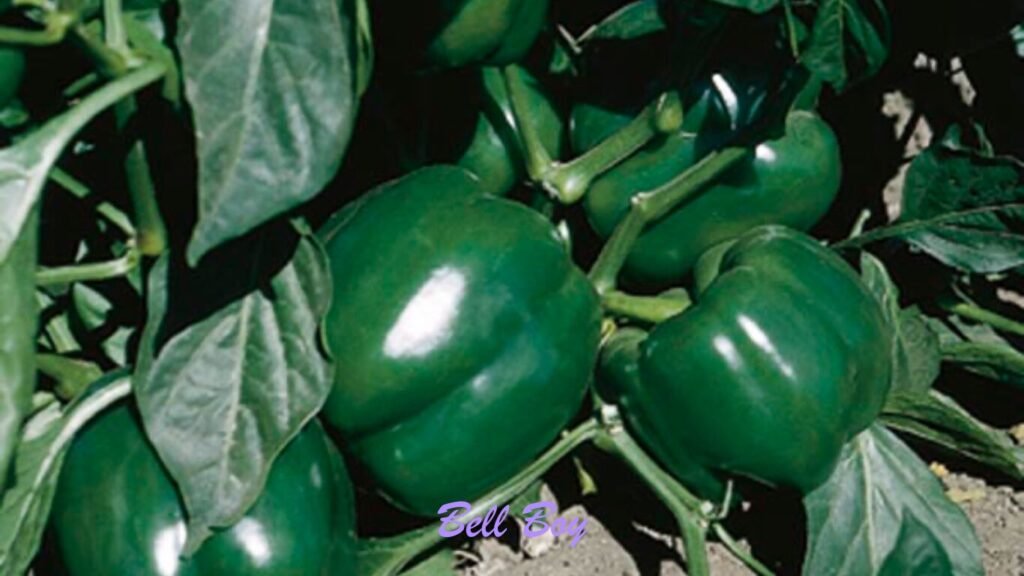
Bell Boy
-Description: This variety produces heavy yields of thick-walled fruits that are sweet and crunchy. It is known for its early maturity.
– Growth Habit: Vigorous plants with good disease resistance, making them ideal for hydroponic setups.
King of the North
– Description: A cold-tolerant variety that produces large, sweet, green peppers. It can also ripen to red if left on the plant longer.
– Growth Habit: Robust growth and can adapt to various growing conditions, making it suitable for hydroponics.
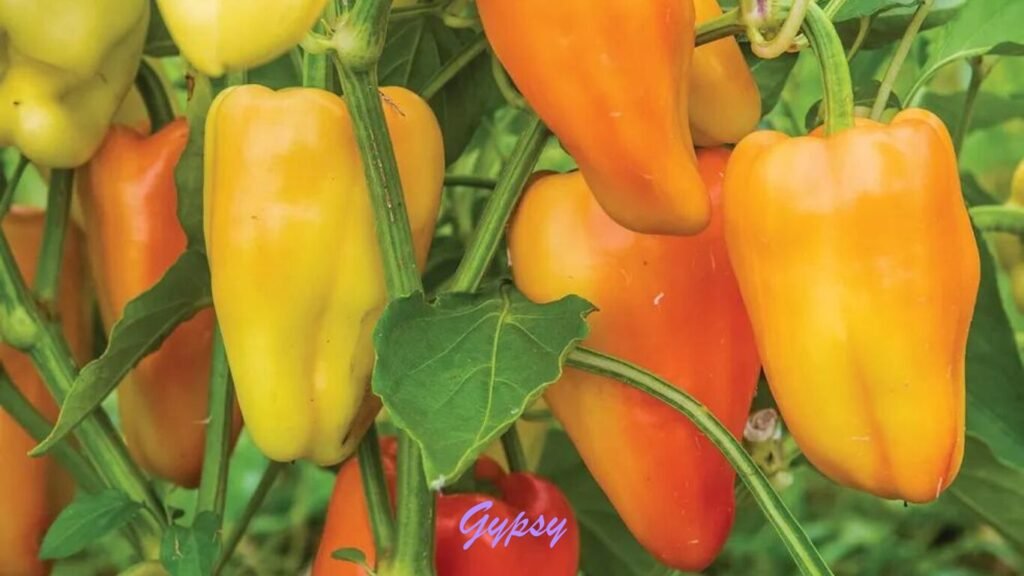
Gypsy
– Description: Gypsy peppers are known for their early maturity and high yields. They are sweet and can be harvested when green or allowed to ripen to a rich red or yellow.
– Growth Habit: Compact plants that are perfect for small spaces and hydroponic systems.
Mohawk
– Description: This variety produces high yields of medium-sized, thick-walled peppers that are sweet and flavorful. They can be harvested green or allowed to ripen to red.
– Growth Habit: Excellent disease resistance and adaptability to hydroponic environments.
Sweet Chocolate
– Description: An interesting variety that matures to a dark brown color. Sweet Chocolate peppers are sweet and have a unique flavor profile.
– Growth Habit: Well-suited for hydroponic systems, providing a different color option for your garden.
Cubanelle
– Description: Although technically a frying pepper, Cubanelle peppers are sweet and can be used in a variety of dishes. They are elongated and lighter in color.
– Growth Habit: Adaptable to hydroponic systems and can yield well in smaller spaces.
Red Knight
– Description: A hybrid variety that produces large, sweet, blocky peppers that ripen to a vibrant red.
– Growth Habit: Strong plants that show good resistance to common diseases.
Tips for Choosing Bell Pepper Varieties
– Disease Resistance: Select varieties that show resistance to diseases common in hydroponic systems, such as bacterial spot or powdery mildew.
– Growth Space: Consider the size and growth habit of the variety, ensuring it fits well in your chosen hydroponic setup.
– Personal Preference: Choose varieties based on your taste preferences and desired culinary uses.
By selecting the right varieties, you can optimize your hydroponic bell pepper garden for better yields and quality


Germination and Planting
Using Rapid Rooters
What Are Rapid Rooters?
– Rapid Rooters are biodegradable seed-starting plugs made from a mixture of organic materials that provide excellent aeration and moisture retention. They are ideal for starting seeds as they allow for healthy root development.
Steps for Germinating Seeds in Rapid Rooters:
Preparation: Soak the Rapid Rooter plugs in water until they are fully saturated but not dripping wet. This typically takes a few minutes.
2. Sowing Seeds:
– Make a small indentation in the top of each plug and place 1-2 seeds per plug.
– Cover the seeds lightly with the material from the plug.
3. Moisture: Place the plugs in a tray with a humidity dome (optional) to retain moisture.
4. Light: Provide indirect light or place them under grow lights. Bell pepper seeds require light for germination but should not be exposed to direct intense light until after germination.
5. Temperature: Maintain a warm environment (ideally between 70°F to 85°F or 21°C to 29°C) for optimal germination.
Using a Heat Mat
Why Use a Heat Mat?
– Heat mats provide consistent warmth, which is crucial for germinating bell pepper seeds. They can help speed up germination time, especially for varieties that prefer warmer soil conditions.
Steps for Germinating Seeds Using a Heat Mat:
Setup: Place the seed-starting tray (with Rapid Rooters, seed starter mix, or another medium) on the heat mat.
2. Temperature Control: Set the heat mat to maintain a temperature between 70°F to 85°F (21°C to 29°C). Use a thermometer to monitor the soil temperature, as too much heat can damage the seeds.
3. Moisture: Ensure the growing medium remains consistently moist (but not soggy). Covering with a humidity dome can help retain moisture.
4. Light Exposure: Once the seeds germinate (typically within 7 to 14 days), provide adequate light to prevent leggy seedlings. Adjust light intensity depending on the growth stage.
Choosing the Method Based on Variety
While most bell pepper varieties can germinate well using either method, you may want to consider the following:
– Early-Maturing Varieties (e.g., Gypsy or Bell Boy): These can benefit significantly from the warmth provided by a heat mat, as they tend to germinate quickly. Using Rapid Rooters with a heat mat can lead to faster growth.
– Disease-Resistant Varieties (e.g., California Wonder or King of the North): These varieties can also thrive in Rapid Rooters with the added warmth of a heat mat. The consistent temperature can help reduce the risk of damping-off disease, which can be a concern in damp conditions.
– Unique Varieties (e.g., Sweet Chocolate): These may have varying germination rates. Using a heat mat can help ensure optimal conditions, particularly if the seeds are older or require more warmth to germinate.
Both Rapid Rooters and heat mats are effective tools for germinating bell pepper seeds in hydroponics. Rapid Rooters provide excellent aeration and moisture retention, while heat mats create the warm environment that bell pepper seeds love. Depending on the variety, using a combination of both can enhance germination success. Whichever method you choose, be sure to monitor moisture levels and provide sufficient light once the seedlings emerge. Happy gardening!
Transplanting your bell pepper seedlings from their germination medium (like Rapid Rooters or seedling trays) to a hydroponic system is an exciting step in the growing process. Here’s a step-by-step guide to help you successfully transplant your plants:
Transplanting Bell Peppers to a Hydroponic System
Timing the Transplant
– Optimal Size: Bell pepper seedlings are ready to be transplanted when they have 2-4 true leaves (the leaves that develop after the initial seed leaves, or cotyledons) and are about 4-6 inches tall.
– Avoiding Stress: Transplant during the cooler part of the day (early morning or late afternoon) to minimize stress on the plants.
Preparing the Hydroponic System
– Choose the Right System: Ensure your hydroponic system (e.g., Deep Water Culture, Nutrient Film Technique, Ebb and Flow) is set up and ready for new plants.
– Nutrient Solution: Prepare a balanced nutrient solution suitable for bell peppers. Check and adjust the pH to around 5.5 to 6.5 for optimal nutrient uptake.
Gather Necessary Supplies
– Tools:
– Scissors or a small knife (for cutting the Rapid Rooters if needed)
– Tweezers or a small tool for handling seedlings
– Gloves (optional, to protect your hands)
– Support Materials: If necessary, plan for stakes or netting to support the plants as they grow.
Removal from Germination Medium
– Careful Handling: Gently remove the seedlings from their germination medium. If using Rapid Rooters, you can often leave the plug intact, as it is biodegradable and can be placed directly into the hydroponic system.
– Avoid Root Damage: Be cautious not to damage the delicate roots when removing them from their starting medium.
Transplanting the Seedlings
– Placement in the Hydroponic System:
– Deep Water Culture (DWC): Place the Rapid Rooter or seedling plug directly into the net pot, ensuring the roots are submerged in the nutrient solution but that the plug remains above the water level to avoid rot.
-Nutrient Film Technique (NFT): Position the seedlings in the channels with the roots hanging down into the nutrient film.
– Ebb and Flow: Place seedlings in net pots filled with a growing medium (like clay pellets) and ensure the pots are placed in the flood tray.
– Spacing: Ensure adequate spacing between plants to allow for airflow and growth. Typically, bell peppers should be spaced about 12-18 inches apart.
Initial Adjustment
– Watering: If you’re using a medium like clay pellets, ensure it’s adequately moist but not waterlogged. In DWC, monitor the water level and ensure the roots are submerged.
– Light: Place the seedlings under grow lights, adjusting the height as necessary to prevent light stress. Aim for 12-16 hours of light per day.
– Temperature and Humidity: Maintain a stable temperature (ideally 70°F to 80°F or 21°C to 27°C) and humidity levels around 50-70%.
Post-Transplant Care
– Monitor Plants: Keep an eye on the plants for the first few days to ensure they adapt well to their new environment. Look for signs of stress, such as drooping leaves or discoloration.
– Nutrient Solution: Check the nutrient solution levels and pH regularly, as newly transplanted seedlings may require adjustments to optimize growth.
– Pruning and Support: As the plants grow, consider pruning any lower leaves to promote air circulation and support the plant with stakes if needed.
Transplanting bell pepper seedlings into a hydroponic system is a crucial step that sets the stage for healthy growth and high yields. By following these steps, you can ensure that your plants transition smoothly into their new environment. With proper care, your bell peppers will thrive and produce delicious fruits for you to enjoy!
Spacing Requirements
Between Plants: Bell peppers should typically be spaced 12 to 18 inches (30 to 45 cm)apart. This spacing allows for good air circulation, light penetration, and room for the plants to grow without overcrowding.
Between Rows: If you are using a row system (like in an Ebb and Flow or NFT setup), ensure there is enough space between rows for easy access to the plants for maintenance, harvesting, and monitoring. A spacing of 24 to 36 inches (60 to 90 cm) between rows is common.
Considerations:
Variety: Some bell pepper varieties may have different growth habits. For instance, larger varieties or those that produce more foliage may require more space.
Training and Support: If you are planning to use trellising or other support methods, consider spacing that will accommodate these systems without overcrowding
Temperature Requirements
Optimal Temperature Range:
– Daytime Temperature: The ideal daytime temperature for growing bell peppers is 70°F to 85°F (21°C to 29°C). This range promotes healthy growth and fruit development.
– Nighttime Temperature: At night, temperatures should ideally be a bit cooler, around 60°F to 70°F (15°C to 21°C). This drop in temperature helps with the plant’s metabolic processes and encourages flowering and fruit set.
Temperature Thresholds:
– Minimum Temperature: Bell peppers can tolerate lower temperatures, but growth will slow significantly if temperatures drop below 60°F (15°C). Prolonged exposure to temperatures below this can lead to poor growth and increased susceptibility to diseases.
– Maximum Temperature: High temperatures above 90°F (32°C) can negatively affect bell pepper plants, causing stress, blossom drop, and poor fruit set. If temperatures exceed 95°F (35°C), it can severely impact yields.
Other Considerations:
– Humidity: Along with temperature, humidity plays a role in the overall health of bell pepper plants. A relative humidity of 50% to 70% is generally ideal.
– Ventilation: Good air circulation is essential to help maintain temperature and humidity levels, especially in indoor or greenhouse environments.
Monitoring and Adjustments
– Use Thermometers: Regularly monitor the temperature using thermometers or temperature sensors to ensure that conditions remain within the optimal range.
– Cooling or Heating Systems: Depending on your growing environment, you may need to use fans, heaters, or air conditioning systems to maintain the desired temperature range.
– Adjust Water Temperature: In systems like Deep Water Culture, ensure that the water temperature is also maintained within the optimal range (ideally around 68°F to 72°F or 20°C to 22°C) to prevent root issues.
By providing adequate spacing and maintaining the appropriate temperature range, you can create a conducive environment for growing healthy and productive bell pepper plants in a hydroponic system. Monitoring conditions and making adjustments as needed will help ensure a successful harvest.
Light Requirements for Hydroponic Bell Peppers
Light is a critical factor in the successful growth of bell peppers in a hydroponic system. Here’s a detailed overview of the light requirements for bell pepper plants.
Light Intensity
– Photosynthetic Photon Flux Density (PPFD): Bell peppers thrive with a PPFD of 400 to 800 µmol/m²/s during the vegetative stage, and slightly higher during the flowering and fruiting stages. Aiming for the higher end of this range can promote robust growth and fruit development.
– Type of Light: Full-spectrum LED grow lights are often recommended, as they provide the necessary wavelengths for both vegetative growth (blue light) and flowering/fruiting (red light).
Duration of Light
– Photoperiod: Bell peppers generally require 12 to 16 hours of light per day.
– Vegetative Stage: During the vegetative stage, aim for about 16 hours of light.
– Flowering and Fruiting Stage: Once the plants start to flower, you can reduce the light to 12-14 hours to encourage fruit set.
Light Cycle
– Consistency: It’s important to maintain a consistent light schedule to mimic natural conditions. Use timers to automate the light cycles for convenience and accuracy.
– Dark Period: Ensure that the plants have a dark period (8-12 hours) to allow for proper metabolic processes and rest, which is crucial for overall plant health.
Distance from Light Source
– Light Positioning: The distance between the light source and the plants will depend on the type of lighting used. For example:
– LED Lights: Generally need to be positioned 12 to 24 inches (30 to 60 cm) above the canopy, depending on the wattage and model. It’s essential to check the manufacturer’s recommendations for specific distances.
– HPS/MH Lights: These lights usually need to be hung higher (around 24 to 36 inches or more) due to higher heat output.
Signs of Inadequate Light
– Stretching: If the plants are stretching towards the light source, it indicates they are not receiving enough light.
– Pale Leaves: Light-deprived plants may exhibit pale or yellowing leaves.
– Poor Growth: Slow or stunted growth can also be a sign of inadequate light conditions.
Tips
For optimal growth of bell peppers in a hydroponic system, aim for 12 to 16 hours of light per day with a moderate to high light intensity (PPFD of 400 to 800 µmol/m²/s). Using full-spectrum LED grow lights and maintaining consistent light cycles will ensure that your bell pepper plants receive the energy they need to thrive and produce a bountiful harvest.
Recommended pH Levels for Hydroponic Bell Peppers
The pH level is crucial for the health and productivity of hydroponic bell peppers. Here’s a detailed overview of the recommended pH levels for growing bell peppers hydroponically:
– Optimal pH Range: The ideal pH range for growing bell peppers in a hydroponic system is between 5.5 and 6.5.
– Best pH: A pH of 6.0 is often considered optimal for nutrient uptake, as it allows for the best availability of essential nutrients needed for growth.
Importance of pH
– Nutrient Availability: Different nutrients are available to plants at different pH levels. Maintaining the pH within the recommended range ensures that essential nutrients—such as nitrogen, phosphorus, potassium, calcium, magnesium, and trace elements—are readily available to the plants.
– Preventing Toxicity: If the pH is too low (acidic) or too high (alkaline), it can lead to nutrient lockout, which means the plants cannot absorb necessary nutrients even if they are present in the solution. Additionally, certain nutrients can become toxic at extreme pH levels.
Monitoring and Adjusting pH
– Regular Testing: It’s important to regularly monitor the pH of your nutrient solution using a pH meter or pH test strips to ensure it remains within the optimal range.
– Adjusting pH: If adjustments are needed:
– To Lower pH: Use pH down solutions (often phosphoric acid or citric acid).
– To Raise pH: Use pH up solutions (commonly potassium hydroxide or sodium bicarbonate).
– Frequent Checks: Check the pH at least once a week, or more frequently if you notice signs of nutrient deficiencies or toxicities.
Signs of pH Imbalance
– Nutrient Deficiencies: Yellowing leaves, poor growth, or leaf curl can indicate a nutrient deficiency, potentially caused by an inappropriate pH level.
– Nutrient Toxicity: Dark, burned leaf tips or abnormal growth can indicate toxicity from nutrient lockout due to improper pH.
Tips
Maintaining a pH level between 5.5 and 6.5, with an optimal target of 6.0, is essential for the healthy growth of bell peppers in a hydroponic system. Regular monitoring and adjustments will help ensure that your plants have access to the necessary nutrients for robust growth and productivity.
Nutrient Management
Growing bell peppers hydroponically requires careful management of nutrient solutions to ensure that the plants receive all the essential elements needed for optimal growth, flowering, and fruiting. Here’s a breakdown of the nutrient requirements for hydroponic bell peppers:
Macronutrients
Nitrogen (N):
– Role: Essential for leaf and stem growth, as it is a key component of chlorophyll and amino acids.
– Recommended Level: 150-200 ppm (parts per million) during the vegetative phase, slightly lower during flowering (100-150 ppm).
Phosphorus (P):
– Role: Important for root development, flowering, and fruiting. Aids in energy transfer and photosynthesis.
– Recommended Level: 40-60 ppm is generally suitable throughout the growing cycle.
Potassium (K):
– Role: Vital for overall plant health, water regulation, and fruit quality. It helps in the movement of nutrients and the synthesis of proteins.
– Recommended Level: 200-300 ppm, with higher levels during fruiting stages.
Calcium (Ca):
– Role: Important for cell wall structure and stability. Helps in nutrient uptake and overall plant vigor.
– Recommended Level: 100-150 ppm.
Magnesium (Mg):
– Role: A central component of chlorophyll and plays a role in photosynthesis. It also assists in the uptake of other nutrients.
– Recommended Level: 50-70 ppm.
Sulfur (S):
– Role: Essential for the formation of amino acids and proteins. It also aids in chlorophyll formation.
– Recommended Level: 20-30 ppm.
Micronutrients
Bell peppers also require smaller amounts of micronutrients, which are equally important for their growth:
1. Iron (Fe):
– Role: Crucial for chlorophyll synthesis and various enzymatic functions.
– Recommended Level: 2-3 ppm.
2. Manganese (Mn):
– Role: Involved in photosynthesis and enzyme activation.
– Recommended Level: 0.5-1 ppm.
3. Zinc (Zn):
– Role: Important for enzyme function and growth regulation.
– Recommended Level: 0.5-1 ppm.
4. Copper (Cu):
– Role: Plays a role in photosynthesis and respiration.
– Recommended Level: 0.1-0.5 ppm.
5. Boron (B):
– Role: Essential for cell wall formation and reproductive growth.
– Recommended Level: 0.5-1 ppm.
6. Molybdenum (Mo):
– Role: Important for nitrogen fixation and enzyme function.
– Recommended Level: 0.05-0.1 ppm.
Nutrient Solutions
1. Commercial Nutrient Solutions: Many growers opt for pre-formulated hydroponic nutrient solutions specifically designed for fruiting plants like bell peppers. These solutions often contain the right balance of macronutrients and micronutrients.
2. Custom Mixing: For those who prefer to mix their own nutrient solutions, it’s important to use high-quality fertilizers that provide a complete nutrient profile. Keep in mind that certain nutrient formulations may be more suitable for specific growth stages (vegetative vs. flowering/fruiting).
Water Quality
– Ensure that the water used in your nutrient solution has low levels of chloramines, chlorine, and other contaminants that can affect nutrient uptake and plant health.
Monitoring Nutrient Levels
– Regular Testing: Use a TDS (Total Dissolved Solids) meter or EC (Electrical Conductivity) meter to monitor nutrient levels in your solution. Ideal EC levels for bell peppers typically range from 1.5 to 2.5 mS/cm, depending on the growth stage.
– Adjusting Nutrients: Regularly adjust the nutrient solution based on the growth stage of the plants and any visible signs of nutrient deficiencies or toxicities.
Tips
Bell peppers require a balanced supply of macronutrients and micronutrients to thrive in a hydroponic system. Regular monitoring and adjustments of nutrient levels will help ensure healthy plant growth, optimal flowering, and successful fruit production. By paying close attention to their nutrient needs, you can achieve a bountiful harvest of delicious bell peppers.
Pollination
Pollination is a critical aspect of growing bell peppers, especially in a hydroponic system where natural pollinators may not be present. Here are some effective pollination techniques you can use to ensure successful fruit set for your hydroponically grown bell peppers:
Hand Pollination
Hand pollination is a straightforward method that can be very effective for bell peppers. Here’s how to do it:
– Tools Needed:
– Soft brush or cotton swab (or you can use your finger).
– Steps:
1. Identify Flowers: Locate the open male and female flowers. Male flowers have a single stamen, while female flowers have a small fruit (ovary) at the base.
2. Collect Pollen: Gently brush the stamen of the male flower with the soft brush or cotton swab to collect pollen.
3. Transfer Pollen: Lightly touch the stigma of the female flower with the brush or swab to transfer the pollen.
4. Repeat: Pollinate multiple female flowers to increase fruit set.
-Timing: Perform hand pollination in the morning when flowers are most receptive.
Vibration Method
Using vibrations can help to mimic the natural action of bees and other pollinators.
– How to Do It:
– Electric Toothbrush: Gently run an electric toothbrush against the flowers or hold it near the flowers to create vibrations. This can help shake pollen loose from the male flowers and encourage it to settle on the female flowers.
– Shaking the Plant: Carefully shake or tap the plant, especially after the flowers open, to help distribute pollen.
Using a Fan
A fan can help facilitate the movement of pollen in the air.- How to Do It:
– Position a small oscillating fan near your hydroponic setup to create air movement. This can help distribute pollen that has been naturally released or collected through hand pollination.
Insect Pollinators
If possible, introducing beneficial insects can help with pollination.
– Bees: If your setup allows, consider introducing bumblebees or other pollinators. This can be particularly effective in larger hydroponic setups or greenhouses. However, ensure that the environment is conducive to their survival (adequate space, food sources, etc.).
Self-Pollination
Bell peppers are mostly self-pollinating, meaning they can produce fruit without needing pollen from another flower. However, facilitating this process can improve fruit set and size.
– Encourage Movement: Simply gently shaking or tapping the plants can help self-pollination by causing pollen to fall from the anthers to the stigma within the same flower.
Proper Environmental Conditions
Creating optimal conditions can enhance pollination success:
– Humidity: Maintain moderate humidity levels (around 60-70%) to ensure that pollen is viable.
– Temperature: Ideal temperatures for bell pepper pollination are between 70°F and 85°F (21°C to 29°C). Extreme temperatures can affect flower viability.
Pruning and Training
Pruning: As bell peppers grow, remove any yellowing or dead leaves to promote air circulation and reduce the risk of disease. Prune excess foliage to focus the plant’s energy on fruit production.
Training: Consider using trellising or stakes to support your plants as they grow. This helps prevent branches from breaking under the weight of the fruit and allows for better light penetration.
Tips
Utilizing these pollination techniques can significantly enhance fruit set and yield in hydroponic bell pepper production. Whether through hand pollination, vibration methods, or even the introduction of pollinators, ensuring that your plants are effectively pollinated will lead to a successful and bountiful harvest. Regular monitoring of flower development and timely intervention will help maximize your crop’s potential
For encouraging pollination in your hydroponically grown bell peppers, one effective product you can consider is a handheld pollinator or vibrating pollinator. These devices simulate the action of bees and can effectively help with pollination.
Harvesting Your Bell Peppers
When to Harvest
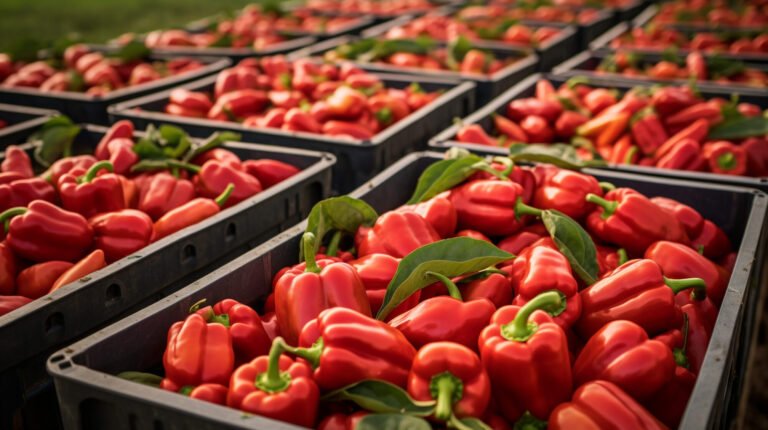
Timing: Bell peppers can be harvested at different stages. For green bell peppers, harvest when they reach full size but before they change color. For colored varieties (red, yellow, orange), wait until they fully ripen on the plant for the sweetest flavor.
Signs of Ripeness: Look for firm, glossy skin and well-defined edges. The color should be vibrant, indicating that the fruit is ready to be picked.
How to Harvest
Use a sharp knife or pruning shears to cut the peppers from the plant, leaving a small stem attached to avoid damaging the plant.Handle the fruits gently to avoid bruising, and store them in a cool, dry place until ready to use.
Post-Harvest Care
Wash the harvested peppers to remove any residues from the hydroponic system.
Store them in the refrigerator to prolong freshness. Bell peppers can last up to two weeks in proper storage conditions.
Conclusion
In conclusion, successful hydroponic bell pepper cultivation hinges on effective pollination techniques, proper nutrient management, and creating optimal growing conditions. Whether you choose to employ hand pollination, utilize vibrating tools, or even introduce beneficial insects, each method plays a vital role in ensuring robust fruit set and maximizing yield. By leveraging the right tools and maintaining a keen eye on your plants’ needs, you can enjoy a bountiful harvest of delicious, homegrown bell peppers. Embrace the journey of hydroponic gardening, and revel in the satisfaction of nurturing your plants from seed to harvest. Happy growing!

